How to compress Images Online Without Losing Quality is something every beginner should understand when working with images on the web. Images make content more attractive, but large image files can slow down websites and take longer to load. By using online image compression tools, you can reduce image size while keeping the picture clear and sharp.
Image compression helps create a balance between image quality and performance. When images load faster, visitors stay longer and have a better experience. The good news is that you do not need advanced skills or software. Many online tools make it easy to compress images in just a few clicks.
Why image compression is important
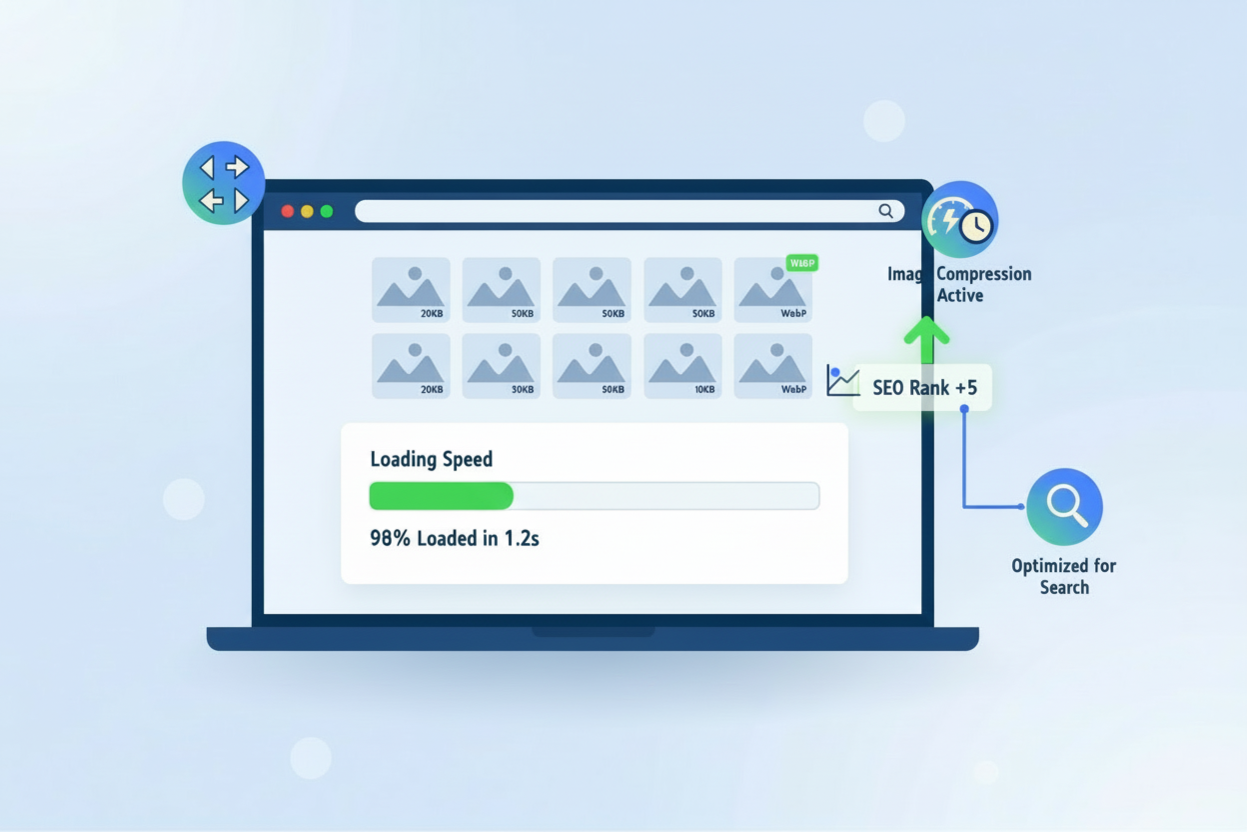
Image compression is important because large images can affect website speed and performance. Slow-loading pages can frustrate users and may even impact search engine rankings. Smaller image files load faster, save storage space, and use less internet data, especially for mobile users.
Compressed images are also easier to upload, share, and send by email. You get high-quality images without the extra file size, which makes your content more efficient and user-friendly.
When you should compress images
You should compress images before uploading them to a website, blog, or online store. It is also useful when sharing images on social media or sending them through email. If an image looks fine but takes too long to load, compression is usually the solution.
Compressing images is especially helpful when you want to improve website speed or provide a smoother user experience. By compressing images online without losing quality, you can keep your visuals attractive while making them faster and easier to use.
What Is Image Compression?


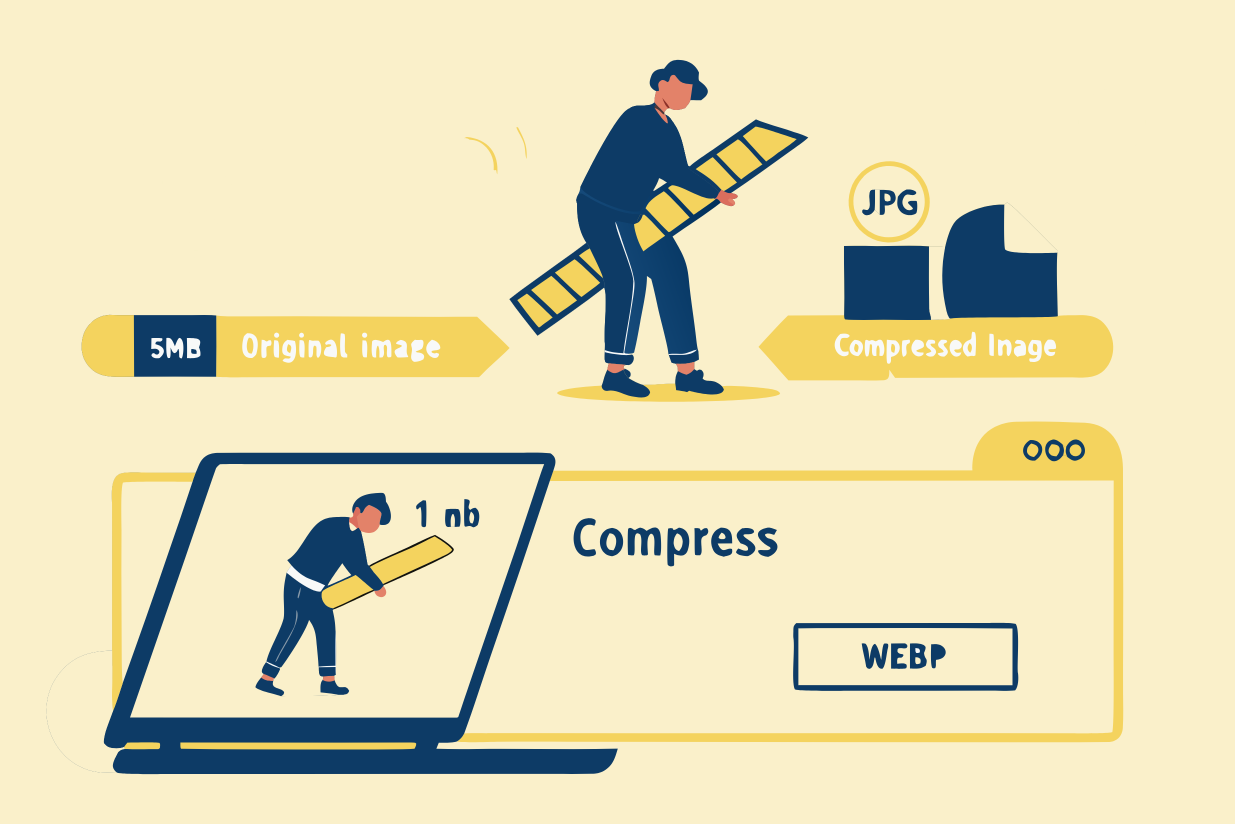
What is image compression is one of the first things beginners should understand when working with images online. Image compression means reducing the file size of an image so it takes up less storage and loads faster, while still looking clear and usable.
Instead of changing how an image looks, compression focuses on optimizing the data inside the file. This makes images easier to upload, share, and display on websites without hurting the visual experience.
How image compression works
Image compression works by removing or reorganizing extra data inside an image file. Some methods reduce details that are not easily noticed by the human eye, while others simply store the same information in a smarter way.
Most online tools handle this automatically. You upload an image, the tool processes it, and you download a smaller file that looks almost the same as the original.
Image size vs image quality
Image size is about how large the file is in terms of storage, while image quality is about how clear and sharp the image looks. A bigger file does not always mean better quality. Many images include unnecessary data that increases size without improving appearance.
Good compression creates a balance. The image stays visually appealing, but the file size becomes smaller, making it faster to load and easier to use online.
Lossy vs Lossless Image Compression
When learning about image compression, you will often hear the terms lossy and lossless. Both methods are used to reduce image file size, but they work in different ways. Understanding the difference helps you choose the right option for your needs.
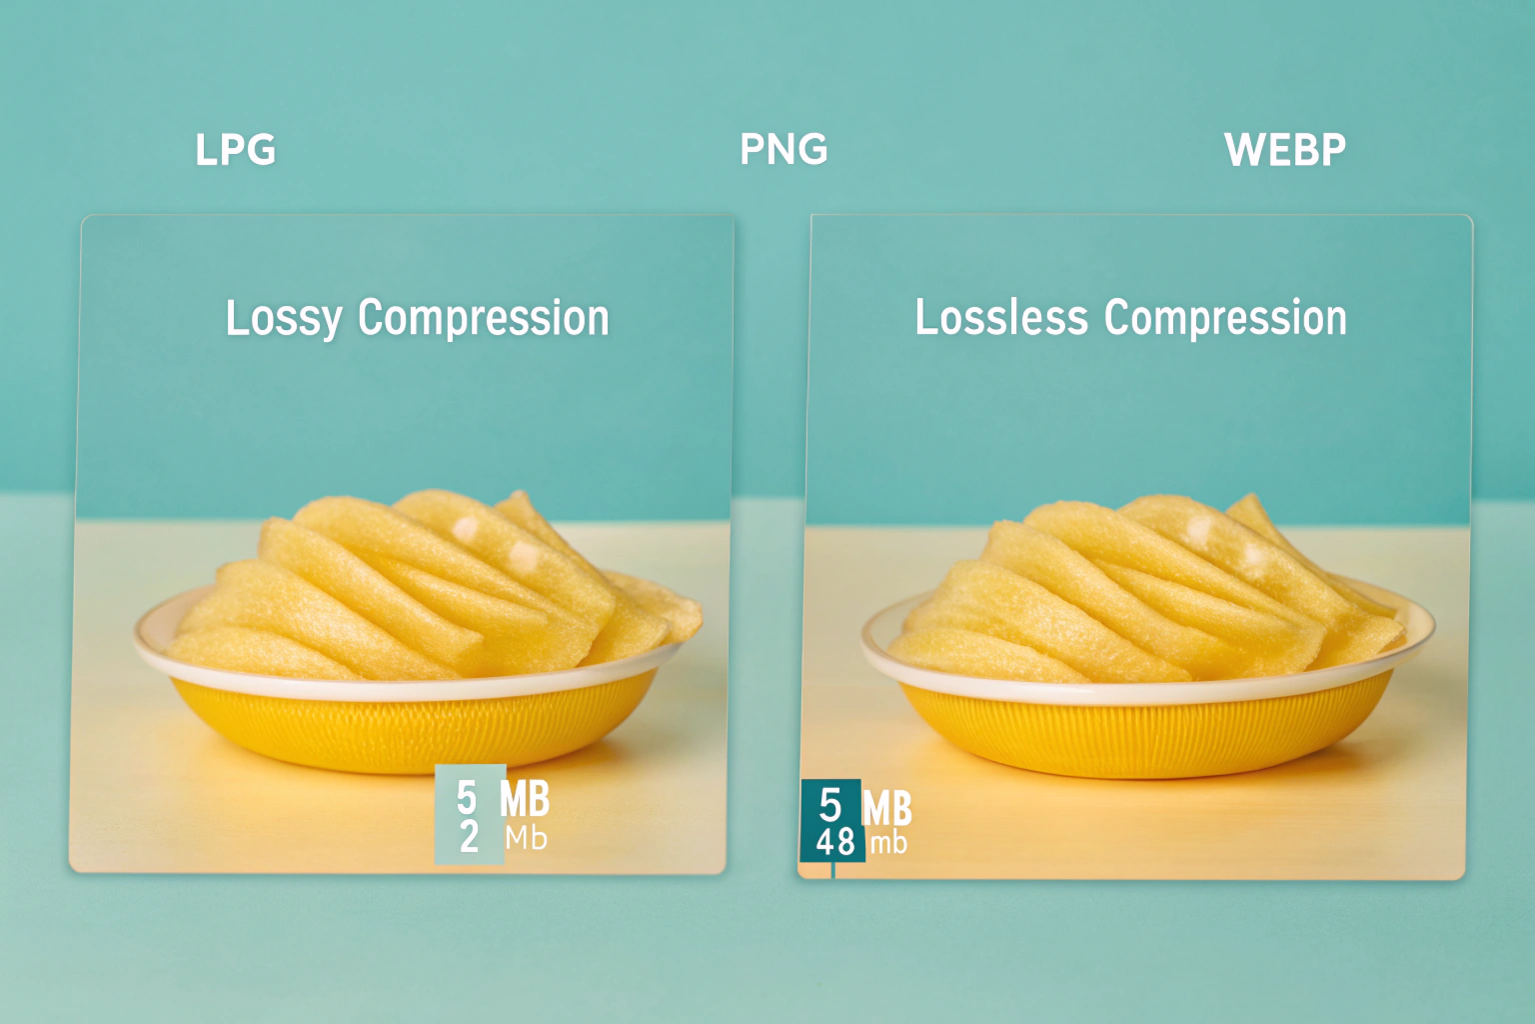
What is lossy compression
Lossy compression reduces image size by removing some image data. This data is usually detail that the human eye does not easily notice. Because of this, the image often looks the same at first glance, but some quality is permanently lost.
Lossy compression is commonly used for photos and web images because it creates much smaller file sizes. Formats like JPG often use this method, making them great for websites where fast loading matters.
What is lossless compression
Lossless compression reduces file size without removing any image data. The image keeps all its original details, and you can restore it back to its original form. This makes lossless compression ideal for images that need perfect quality.
Formats like PNG and WebP often use lossless compression. These are useful for logos, graphics, and images with text where clarity is important.
Which one is best for quality
If your top priority is image quality, lossless compression is the better choice because nothing is removed from the image. However, the file size will be larger compared to lossy compression.
Lossy compression is best when you want smaller file sizes and faster loading while still keeping good visual quality. For most beginners and everyday use, lossy compression offers a good balance between quality and performance.
Best Image Formats for Compressing Images Without Quality Loss
Choosing the right image format plays a big role in how well your images compress and how good they look after compression. Some formats are better for photos, while others work best for graphics and web use. Understanding these formats makes it easier to keep image quality high while reducing file size.
JPEG (JPG) compression explained
JPEG, also known as JPG, is one of the most widely used image formats on the web. It works best for photographs and images with lots of colors and details. JPG uses lossy compression, which means it reduces file size by removing small details that most people do not notice.
When used carefully, JPG compression can significantly reduce image size while keeping the image looking clear. It is a popular choice for websites, blogs, and social media because it loads fast and works on all devices.
PNG compression explained
PNG is a great format for images that need sharp details and transparency, such as logos, icons, and graphics with text. PNG usually uses lossless compression, so image quality stays the same even after compression.
Because no data is removed, PNG files are often larger than JPG files. However, they are ideal when you want clean edges, clear text, and no quality loss at all.
WebP for modern websites
WebP is a modern image format designed specifically for the web. It supports both lossy and lossless compression, which gives you flexibility depending on your needs. WebP images are usually smaller than JPG and PNG while still looking high quality.
This format is excellent for websites focused on speed and performance. Most modern browsers support WebP, making it a smart choice for compressing images without noticeable quality loss.
Step-by-Step Guide to Compress Images Online Without Losing Quality
Compressing images online is simple and does not require any technical skills. Most tools follow the same basic steps, which makes the process easy even for beginners. By following these steps, you can reduce image size while keeping the image clear and sharp.
Choosing the right online tool
Start by choosing a reliable online image compression tool. Look for a tool that supports your image format, such as JPG, PNG, or WebP. A good tool should be easy to use, free or low cost, and not require software installation.
Many tools also show a preview or percentage of size reduction. This helps you understand how much the image is compressed before downloading it.
Uploading and compressing images
Once you choose a tool, upload your image directly from your device. Some tools allow you to upload multiple images at the same time. After uploading, select the compression level if the option is available.
The tool will automatically compress the image. This usually takes only a few seconds. Most tools balance size and quality automatically, so you do not need to adjust advanced settings.
Downloading optimized images
After compression is complete, download the optimized image to your device. It is a good idea to compare the compressed image with the original to make sure the quality looks good.
Always keep a backup of the original image, especially if you plan to edit or reuse it later. Using optimized images helps your website load faster while still looking professional.
Best Free Online Image Compression Tools for Beginners
When you want to compress images online without losing quality, using the right tools makes the process quick and stress-free. There are many free tools available that work in your browser, support popular formats like JPG and PNG, and even let you compress many images at once.
Tools for JPG and PNG images
Here are a few great free online tools that beginners can use to compress JPG and PNG images easily:
CompressImageFree – Simple drag-and-drop compression for JPG, PNG and WebP. You can compress up to 20 images at once without installing anything.
Compress-Images.com – Fast and user-friendly with support for JPG, PNG and WebP. It compresses images right in your browser and lets you download them individually or in a ZIP file.
CompressIMG – Easy tool that lets you adjust compression levels and convert images to WebP during compression for even smaller size.
Narpix Photo Compressor – Supports JPG and PNG plus modern formats like AVIF and WebP, with options for batch downloads and private compression.
These tools are beginner-friendly so you don’t need advanced skills to start compressing your images.
Tools for bulk image compression
If you have many images to shrink at once, batch or bulk compressors save time and effort:
CompressImageFree – Allows multiple uploads and a “Download All” option to get everything at once.
Compress-Images.com – Supports batch processing, so you can upload many files and compress them in one go.
ReducePic – Designed especially for bulk compression. You can drop many images together and compress them quickly without losing quality.
MinifyImage.com Bulk Compressor – Lets you upload up to dozens of images and download all compressed files together.
Bulk compression tools are perfect when you’re preparing lots of photos for a website, portfolio, or gallery.
Browser-based vs cloud tools
There are two main types of online image compressors:
Browser-based tools run the compression directly in your web browser without uploading images to a server. This means your photos stay private, and the process is often faster. Many of the tools above like CompressImageFree and Narpix work this way.
Cloud-based tools upload your images to a remote server to do the compression. These can sometimes offer more advanced settings or better compression ratios, but they may require sign-ups and send your files over the internet.
For beginners, browser-based tools are usually easier and more secure, and they still deliver great results without losing image quality.
Tips to Maintain Image Quality After Compression
Compressing images is helpful, but doing it the right way is important to keep them looking clear and professional. A few simple habits can make a big difference in maintaining image quality after compression, especially for beginners.
Choosing correct compression level
Always choose a compression level that balances size and quality. If the compression is too high, images may look blurry or pixelated. If it is too low, the file size may not reduce much. Many online tools offer a preview, which helps you see how the image looks before downloading it.
For most uses, a medium compression level works well and keeps the image visually clean while reducing file size.
Avoiding multiple compressions
Avoid compressing the same image again and again. Each time an image is compressed, especially with lossy methods, some quality can be lost. Repeated compression can make images look dull or distorted over time.
If you need to resize or edit an image later, start from the original file instead of the already compressed version.
Keeping original image backup
Always keep a backup of the original image before compression. This gives you a safe copy in case you need higher quality later for printing, editing, or reuse.
Having the original image saved also allows you to try different compression tools or settings without worrying about quality loss. It is a simple step that saves time and protects your images in the long run.
Conclusion
Compressing images online without losing quality is easier than it sounds, especially with the right tools and approach. By understanding image compression, choosing the right format, and using reliable online tools, you can reduce file sizes while keeping your images clear and professional.
Best practices summary
Use the appropriate image format: JPG for photos, PNG for graphics with text or transparency, and WebP for modern web use.
Choose a compression level that balances quality and size, and avoid over-compressing.
Use trusted online tools, preferably browser-based, to keep your images private and safe.
Compress images only once and always keep a backup of the original file.
Final beginner tip
For beginners, the key is to experiment with a few free online tools and check the results. Compare the compressed image with the original to make sure the quality is still good. With practice, compressing images will become a quick and simple step that improves website speed, saves storage, and keeps your visuals looking great.
Need to Compress or Convert Files?
Try CompressNow.in - Free, Fast & Secure file compression and conversion tools!

Author Bio – Tanishk Singh
Tanishk Singh is a Digital Marketing Strategist, SEO Specialist, and Web Technology Expert with over 4+ years of hands-on experience in building, ranking, and monetizing high-performance web platforms.
He has helped scale organic traffic for multiple education and SaaS websites, including increasing Shoolini Online’s SEO traffic from 800 to 20,000+ users in just 2.5 months using advanced content architecture, AI-driven SEO, and Google SGE optimization.
Tanishk specializes in creating AI-powered web tools, performance-optimized platforms, and SEO-focused websites that rank, convert, and generate consistent revenue.