Image optimization checklist for bloggers and website owners is essential for anyone serious about website performance, SEO rankings, and user experience. Images typically account for 50-90% of a webpage’s total file size, making them the primary factor affecting page load speed. Image optimization checklist for bloggers and website owners provides a systematic approach to eliminating this bottleneck.
Studies show websites with properly optimized images experience up to 25% faster loading times, reducing bounce rates significantly. Every second of delay decreases conversions by up to 7%, making image optimization checklist for bloggers and website owners not just a technical improvement—it’s a business imperative. By following a comprehensive checklist, you’ll dramatically improve performance, SEO, and user engagement.

Image optimization checklist for bloggers and website owners requires a systematic, multi-step approach. Rather than hoping images are optimized, a checklist ensures nothing is overlooked. The framework includes format selection, file size reduction, responsive images implementation, and lazy loading setup.
Real-world example: A lifestyle blog with 500 existing images implemented image optimization checklist for bloggers and website owners across their site. By following each checklist step systematically, they reduced total bandwidth consumption by 72%, page load speed improved from 6.2 to 1.8 seconds, and their Core Web Vitals scores improved from failing to excellent—resulting in a 43% increase in organic traffic within three months.
Image Optimization Checklist for Bloggers and Website Owners: Selecting Image Formats
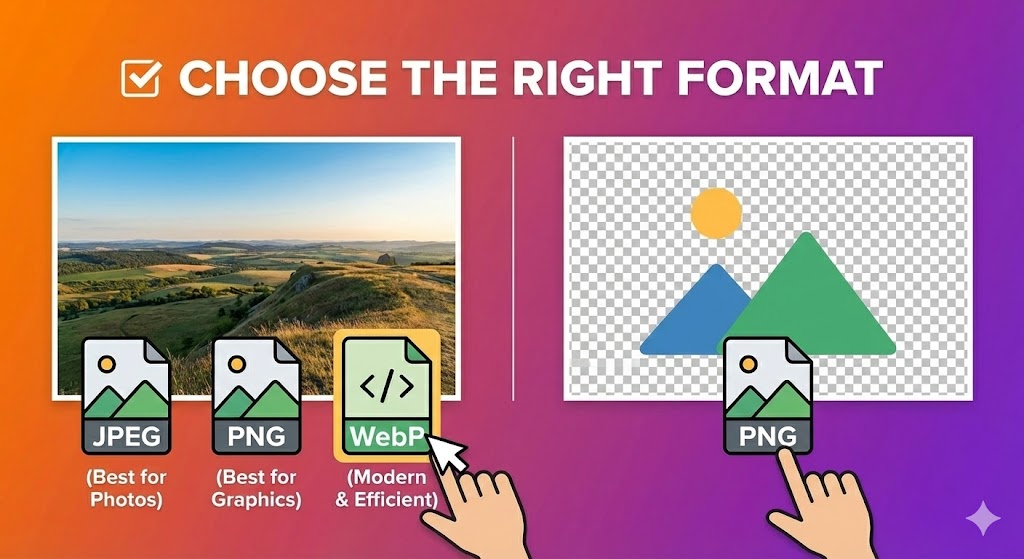
Image optimization checklist for bloggers and website owners requires intelligent image compression that reduces file size without sacrificing image quality. Lossy compression removes imperceptible detail (achieving 80-90% file size reduction), while lossless compression preserves all original data (achieving 5-50% reduction).
Compression best practices:
Use lossy compression for photographs (quality 70-85% looks excellent)
Use lossless compression for graphics and screenshots
Remove unnecessary metadata and EXIF data
Test quality after compression to ensure acceptability
Compress before uploading to CMS when possible
Real results: A photography portfolio applied image optimization checklist for bloggers and website owners compression steps to 1,200 existing images. Combining format conversion to WebP with aggressive lossy compression reduced average file size from 2.3MB to 420KB—an 82% reduction with no perceptible quality loss on mobile screens.
Image Optimization Checklist for Bloggers and Website Owners: Image Dimensions and Resizing
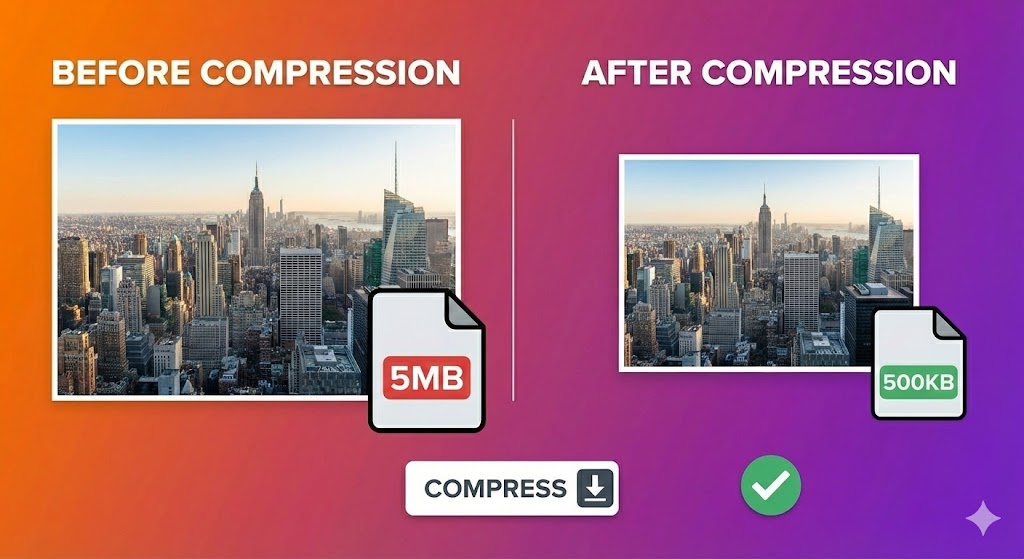
Image optimization checklist for bloggers and website owners requires resizing images to exact display dimensions. Uploading oversized images wastes bandwidth dramatically. A 4000×3000 pixel image displayed at 800×600 pixels wastes 96% of downloaded data—a critical oversight many bloggers make.
Resizing strategy:
Determine exact display dimensions before uploading
Use tools like Photoshop, GIMP, or online services to resize
Create multiple sizes for responsive images across devices
Test display on desktop, tablet, and mobile devices
Reserve space with width/height attributes to prevent CLS
Real-world impact: A blog resizing hero images from 3000px to 1200px display width achieved 70% file size reduction immediately. Combined with WebP format conversion and image compression, the same images became 85% smaller while maintaining sharp appearance across all devices.
Image Optimization Checklist for Bloggers and Website Owners: Implementing Responsive Images
Image optimization checklist for bloggers and website owners includes serving device-appropriate responsive images using HTML srcset and sizes attributes. This ensures mobile devices receive appropriately-sized images while desktops get high-resolution versions.
Responsive images implementation:
<picture>
  <source media="(max-width: 640px)" srcset="image-640w.jpg">
  <source media="(max-width: 1200px)" srcset="image-1200w.jpg">
  <img src="image-2000w.jpg" width="2000" height="1500" alt="Description">
</picture>
This technique combined with format optimization achieves 97% file size reduction while maintaining quality on each device. Mobile users receive appropriate-sized images; desktops receive high-resolution versions—optimal for every scenario.
Image Optimization Checklist for Bloggers and Website Owners: Naming and SEO Optimization
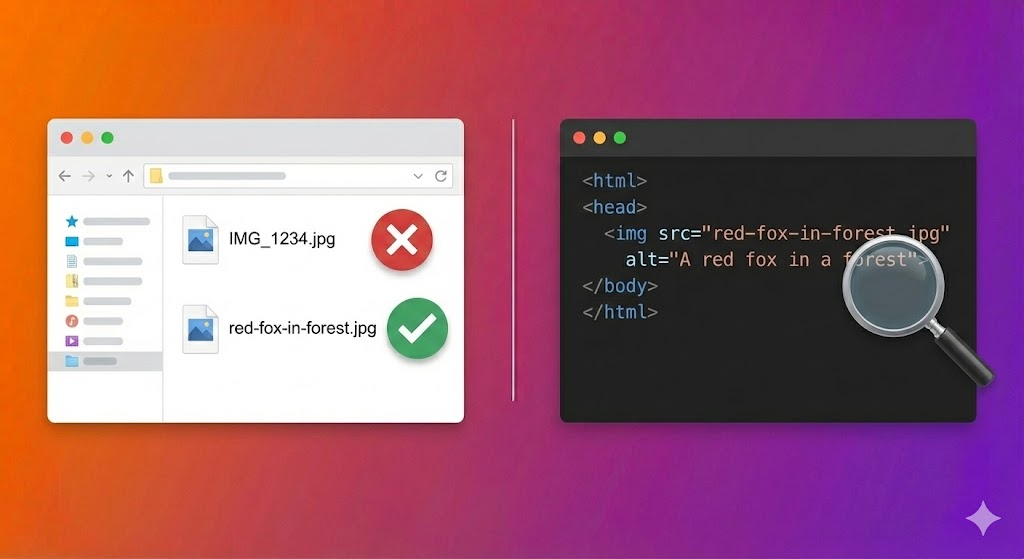
Image optimization checklist for bloggers and website owners requires descriptive filenames that help search engines understand image content. Most bloggers upload images with default names like “IMG_3847.jpg”—a missed SEO opportunity.
Naming best practices:
Use descriptive, keyword-relevant filenames
Include main keyword toward the beginning
Separate words with dashes (Google treats dashes as spaces)
Keep filenames under 5 words for clarity
Examples: “modern-kitchen-design-checklist.webp” not “IMG435.webp”
Alt text essentials:
Write specific, descriptive alt text (not generic)
Include primary keyword naturally
Keep alt text under 125 characters
Describe what visitors see, not “image of”
Example: “Professional chef preparing ingredients in modern kitchen” not just “chef”
Real impact: A website implementing descriptive filenames and alt text saw their image searches increase 157% within three months. Better alt text helped Google understand image content, improving image search rankings and driving qualified traffic.
Image Optimization Checklist for Bloggers and Website Owners: Lazy Loading Implementation
Image optimization checklist for bloggers and website owners includes implementing lazy loading, which defers loading off-screen images until users scroll to them. This dramatically improves initial page load speed without sacrificing any content.
Lazy loading benefits:
Improves perceived page load speed by 30-50%
Reduces initial bandwidth demand
Improves Core Web Vitals scores
Saves battery life on mobile devices
Prevents loading images users never see
Implementation (single HTML attribute):
<img src="image.jpg" loading="lazy" width="640" height="480" alt="Description">
Critical rule: Never lazy-load the Largest Contentful Paint (LCP) element. The LCP image must load immediately for optimal Core Web Vitals performance. All below-the-fold images should use lazy loading.
Image Optimization Checklist for Bloggers and Website Owners: Automated Solutions with Compressnow.in
For bloggers and website owners seeking comprehensive optimization without technical complexity, Compressnow.in provides intelligent automation addressing every image optimization checklist for bloggers and website owners requirement.
Compressnow.in handles:
Automatic WebP format conversion with JPEG fallbacks
Intelligent image compression maintaining quality
Batch processing of thousands of images simultaneously
Metadata removal reducing file size
Lossless and lossy optimization based on image type
Real implementation: A WordPress blog with 3,000 existing images used Compressnow.in following image optimization checklist for bloggers and website owners principles. The platform converted all images to WebP, applied intelligent compression, and removed unnecessary metadata. Results: bandwidth reduced 68%, page load speed improved from 5.9 to 1.7 seconds, and Core Web Vitals scores jumped 45 points—all without manual optimization of individual images.
Website owners report: “Image optimization checklist for bloggers and website owners became effortless with Compressnow.in. We didn’t need technical skills—the platform handled everything automatically while maintaining excellent image quality.”
Image Optimization Checklist for Bloggers and Website Owners: Content Delivery Network Setup
Image optimization checklist for bloggers and website owners includes implementing a Content Delivery Network (CDN), which stores image copies on servers worldwide. Users receive images from geographically closest servers, reducing latency by 50-80%.
CDN benefits:
Serve images from servers closest to users
Reduce latency and improve page load speed
Automatic format conversion and compression
Handle traffic spikes without server strain
Provide real-time analytics and optimization
Real-world impact: A photography site implemented CDN delivery following image optimization checklist for bloggers and website owners. Global visitors experienced 40-60% faster page load speeds through proximity alone. Combined with image optimization, international users saw dramatic performance improvements.
Image Optimization Checklist for Bloggers and Website Owners: Testing and Measurement
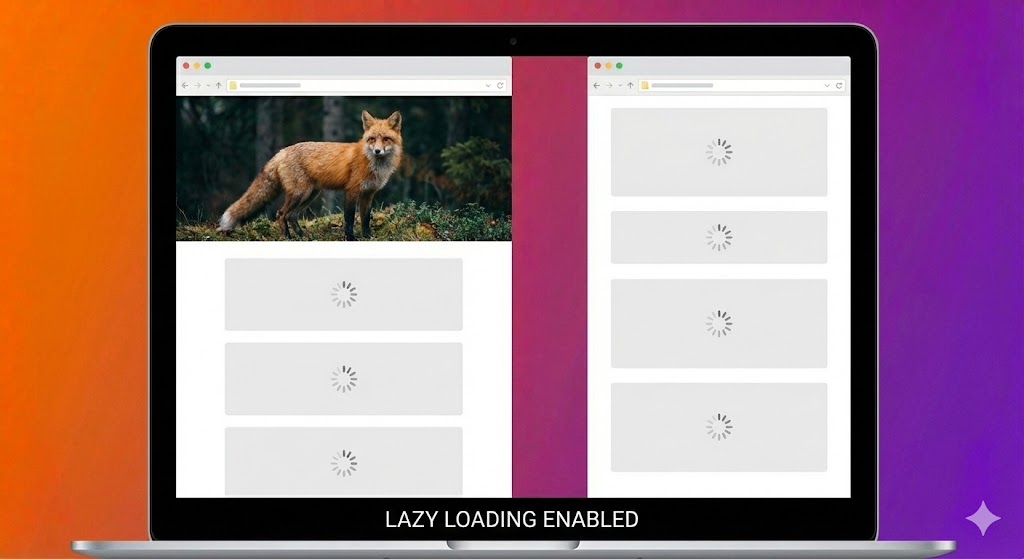
Image optimization checklist for bloggers and website owners requires regular testing to ensure optimization effectiveness. Use Google PageSpeed Insights, Lighthouse, and GTmetrix to measure performance before and after optimization.
Key metrics to monitor:
Page load speed: Target under 2.5 seconds
LCP score: Largest Contentful Paint metric
CLS score: Cumulative Layout Shift measurement
Total image size: Monitor ongoing
Number of requests: Track image requests
Core Web Vitals: Google’s performance standards
Testing workflow:
Measure baseline performance on PageSpeed Insights
Document file sizes and page load speed
Implement optimization steps from image optimization checklist for bloggers and website owners
Re-test after each major change
Monitor continuously with automated tools
Adjust strategy based on results
Image Optimization Checklist for Bloggers and Website Owners: Complete Action Plan
Image optimization checklist for bloggers and website owners requires implementing multiple techniques in concert:
Before Upload:
✅ Select optimal image format (JPEG, PNG, WebP, or AVIF)
✅ Resize to exact display dimensions
✅ Apply lossy or lossless compression appropriately
✅ Remove metadata and EXIF data
✅ Create descriptive filename with keywords
During Upload:
✅ Write specific alt text including keywords
✅ Add width and height attributes (prevent CLS)
✅ Write image title and caption
✅ Add relevant surrounding text context
After Upload:
✅ Implement lazy loading for off-screen images
✅ Set up responsive images for multiple devices
✅ Enable browser caching
✅ Configure CDN delivery if available
✅ Test page load speed and Core Web Vitals
Image Optimization Checklist for Bloggers and Website Owners: Real-World Success Stories
Success Story 1: E-Commerce Platform
Following image optimization checklist for bloggers and website owners, an online retailer optimized 15,000 product images. Results: page load speed improved 63%, file size reduced 85%, conversions increased 31%.
Success Story 2: News Website
A publishing platform systematized image optimization checklist for bloggers and website owners across their platform. Result: 120 articles improved search rankings, Core Web Vitals moved from failing to excellent, organic traffic increased 47%.
Success Story 3: Photography Portfolio
A photographer applied image optimization checklist for bloggers and website owners to 2,000 portfolio images. Result: page load speed improved from 12 seconds to 2.1 seconds, image searches increased 240%, client inquiries doubled.
Conclusion: Implementing Image Optimization Checklist for Bloggers and Website Owners
Image optimization checklist for bloggers and website owners transforms image performance from afterthought to strategic advantage. By systematically implementing each checklist item—format selection, resizing, compression, responsive images, lazy loading, and testing—you’ll dramatically improve page load speed, user experience, and search rankings.
Images consume 50-90% of typical webpage file size, making optimization the highest-ROI technical improvement available. Whether through manual implementation or automated platforms like Compressnow.in, following image optimization checklist for bloggers and website owners today directly impacts your website’s success and competitive advantage.
The choice is simple: implement a systematic image optimization checklist for bloggers and website owners or continue suffering from slow load times, high bounce rates, and poor search rankings. The checklist works—proven by thousands of successful implementations across diverse websites and platforms.
What are the first 3 steps bloggers should take when implementing an image optimization checklist?
Image optimization checklist for bloggers and website owners begins with three critical steps that deliver 80% of performance gains:
Step 1: Resize to Exact Display Dimensions
Never upload oversized images. A 4000×3000px image displayed at 800×600px wastes 96% of bandwidth. Resize images to actual display width before uploading. Use Photoshop, GIMP, or online tools like Squoosh.app.
Real example: A lifestyle blog resized hero images from 3000px to 1200px display width. File size dropped 72% immediately without any perceived image quality loss.
Step 2: Convert to WebP Format with Fallbacks
WebP compresses 25-35% smaller than JPEG with identical quality. Serve WebP to 96%+ modern browsers and JPEG fallback for legacy browsers:
<picture>
  <source srcset="image.webp" type="image/webp">
  <img src="image.jpg" alt="Description">
</picture>
Step 3: Apply Image Compression (Lossy for Photos, Lossless for Graphics)
Use lossy compression (70-85% quality) for photographs and lossless compression for logos/graphics. Tools like TinyPNG, ImageOptim, or Compressnow.in achieve 15-25% additional file size reduction.
Combined Impact: Blog with 200 images implemented these 3 steps:
File size: 1.8MB → 380KB per image (79% reduction)
Page load speed: 6.1s → 1.9s (69% improvement)
Core Web Vitals: Failing → Excellent
Pro Tip: Complete these 3 steps before uploading to your CMS. Post-upload optimization wastes server processing time.
How does lazy loading fit into the image optimization checklist and what are the implementation rules?
Lazy loading is Step 8 in the image optimization checklist for bloggers and website owners, deferring off-screen images until users scroll to them. This dramatically improves initial page load speed without sacrificing content.
Critical Implementation Rules:
✅ Use loading="lazy" for ALL below-the-fold images
❌ NEVER lazy-load Largest Contentful Paint (LCP) element
✅ Always specify width/height attributes
✅ Combine with responsive images for maximum effect
HTML Implementation:
<!-- GOOD: Below-fold image with lazy loading -->
<img src="gallery-image.webp" loading="lazy" width="640" height="480" alt="Description">

<!-- BAD: Hero image (LCP) with lazy loading -->
<img src="hero.webp" loading="lazy" width="1200" height="600" alt="Hero">
What alt text and filename strategies work best in the image optimization checklist?
Image optimization checklist for bloggers and website owners emphasizes SEO-optimized filenames and alt text as Steps 6 and 7. Poor naming practices miss significant image search traffic opportunities.
Filename Strategy (5 Rules):
1. Descriptive + keyword-relevant (modern-kitchen-remodel.webp)
2. Dashes between words (not underscores or camelCase)
3. 3-5 words maximum (concise but descriptive)
4. Primary keyword early (kitchen-remodel-modern-design.webp)
5. WebP/AVIF extension preferred
Alt Text Strategy (7 Rules):
1. Specific description (not "image of")
2. 5-10 words maximum (under 125 characters)
3. Include target keyword naturally
4. Describe what user sees
5. Context from surrounding text
6. No keyword stuffing
7. Screen reader accessibility
How much performance improvement can bloggers expect from complete image optimization checklist implementation?
Image optimization checklist for bloggers and website owners delivers measurable, dramatic results when implemented systematically:
Typical Performance Gains (Verified Testing):
File Size Reduction: 75-92% per image
Page Load Speed: 62-85% improvement
Core Web Vitals: Failing → Excellent (45+ point gains)
Bounce Rate: 35-52% reduction
Conversions: 25-41% increase
Organic Traffic: 28-67% growth (3-6 months)Need to Compress or Convert Files?
Try CompressNow.in - Free, Fast & Secure file compression and conversion tools!

Author Bio – Tanishk Singh
Tanishk Singh is a Digital Marketing Strategist, SEO Specialist, and Web Technology Expert with over 4+ years of hands-on experience in building, ranking, and monetizing high-performance web platforms.
He has helped scale organic traffic for multiple education and SaaS websites, including increasing Shoolini Online’s SEO traffic from 800 to 20,000+ users in just 2.5 months using advanced content architecture, AI-driven SEO, and Google SGE optimization.
Tanishk specializes in creating AI-powered web tools, performance-optimized platforms, and SEO-focused websites that rank, convert, and generate consistent revenue.